
Tags

Happy New Year everyone! Champagne is a staple for celebrating special occasions such a ringing in the New Year and even sometimes just for a regular party. Now you can keep the celebrations going by getting the look of bubbly on your nails with this tutorial.
Check out this easy and simple, champagne inspired design!
Steps:
1. Start with a base coat, and paint your nails two coats of a champagne colored nail polish. If you’re not steady with liquid lacquer, try these Sally Hansen Salon Effects Nail Polish Strips in Glitz Blitz.

2. Make sure your champagne polish is completely dry. Pour some sugar out into a shallow dish or onto a napkin or piece of paper. Apply a single layer of top coat onto your nail, and roll your nail in the sugar, taking care to evenly coat it. You can use salt, but I liked the way the sugar looked better.
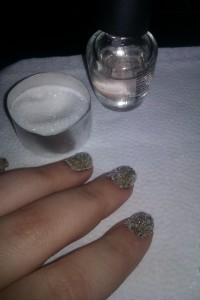
3. After the topcoat and sugar have dried, brush off any excess sugar, and apply another layer of top coat over the sugar. This will slightly dissolve the sugar and give your nails a wonderful texture that reminds me of the carbonation bubbles in champagne.

You can opt to add an extra top coat to really seal in this glittery madness, but I love the way it looks with just one! If you recreate this look, show me! Tweet me a pic at @stacyluvsglittr on twitter or tag me on instagram with @stacylovesglitter 😉

Thats incredible! I had no idea you could do this!!!